There may be a situation when you need to move one of your servers that is part of an Availability Group to a different data center and the IP address for that server will change. In this example, we will be moving a DR node from one data center to another and change the IP of that server. I will not talk about how to VMotion (VMWare) the server to a different data center. Nor will I mention how to change the IP address within DNS and on the server itself. That is out of the scope of this blog.
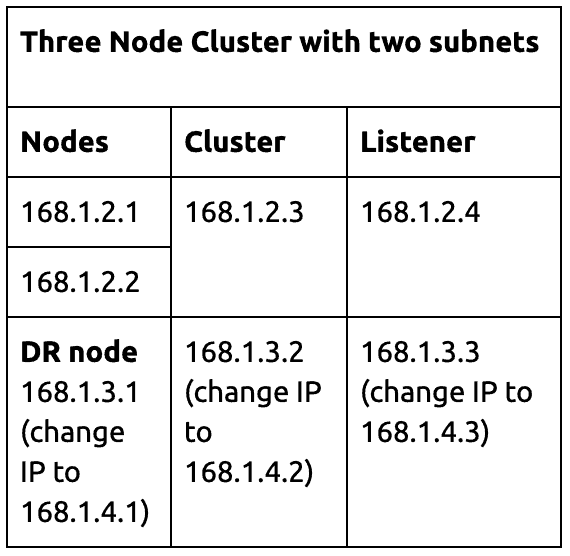
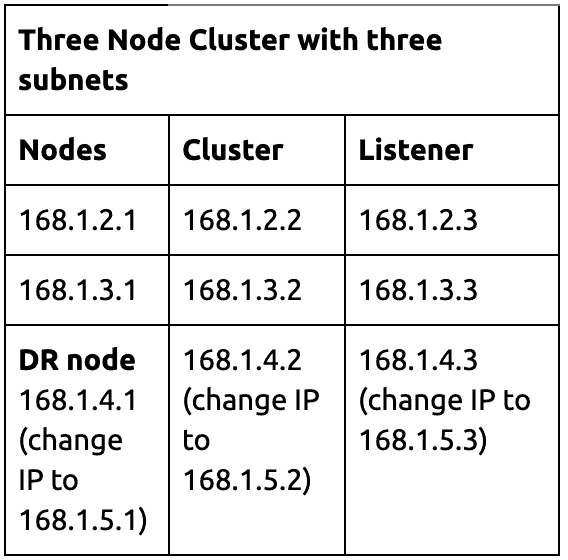
Follow these steps to remove the DR node from the AG and Cluster since it will get a new IP address and be located on a different subnet. For servers that are on different subnets, you have to have a cluster IP and listener IP for each subnet. You may have a situation where you have two nodes in the same subnet and one DR or another secondary server in a different subnet. In that scenario, you will have one cluster IP address and one listener IP address for each subnet so a total of two cluster and two listener IP addresses. You may also have a scenario where all three of your servers are in different subnets. In that case, you will have three cluster IP addresses and three listener IP addresses total.
Example of IPs:
Remove the Node from the AG then the Cluster
1. Log into SSMS, connect to the Primary.
2. Set the DR server as synchronize if it is not already. We want the transactions to be in sync to the DR server before we remove it from the AG.
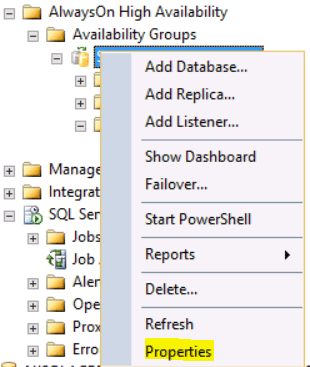
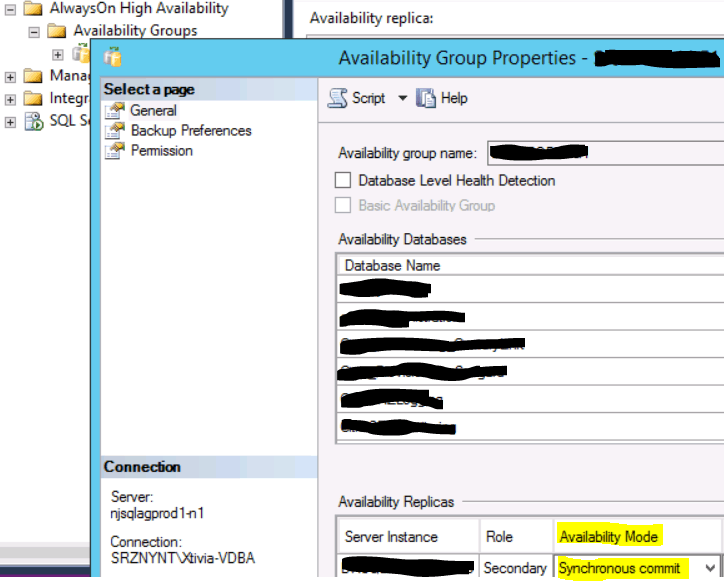
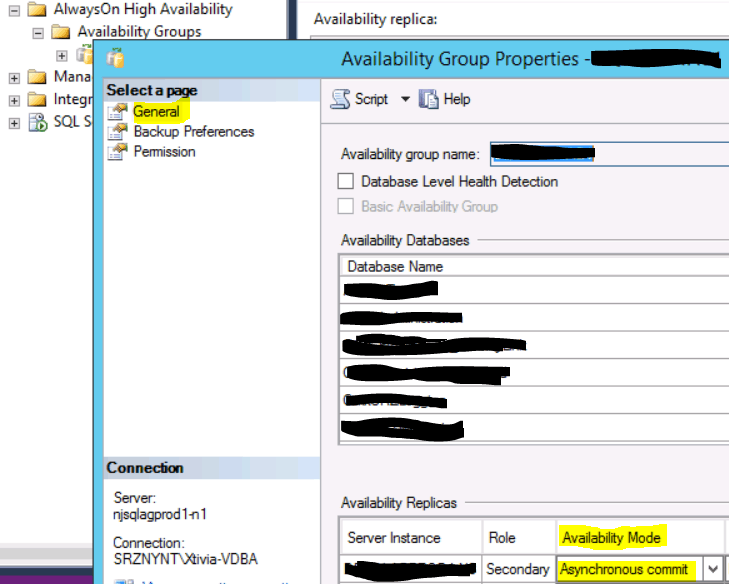
- Expand AlwayOn High Availability, Availability Groups, your AG, Availability Replicas. Right click on it and choose Properties. Verify or change the Availability Mode to Synchronous commit.
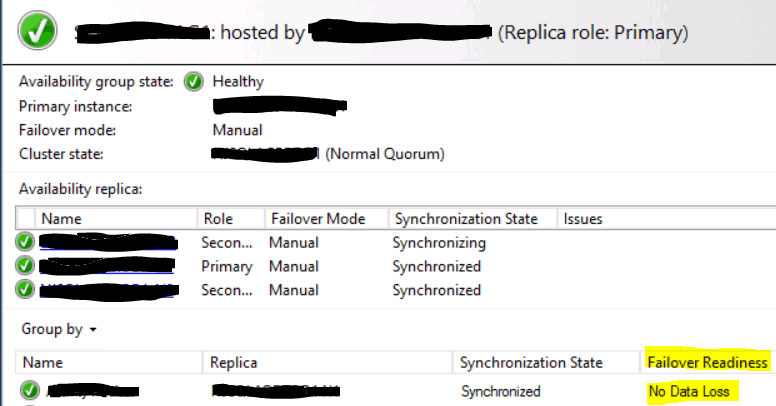
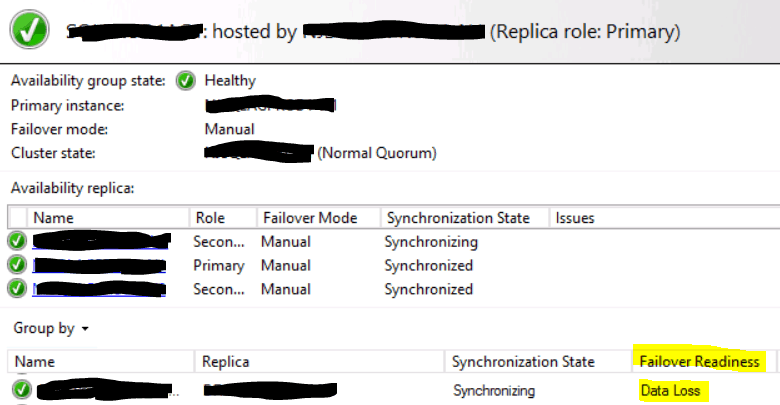
- Right click AlwaysOn High Availability and click the Show Dashboard and verify all databases on all nodes are showing Failover Readiness is set to No Data Loss. You may need to refresh often to show the new status.
3. Disable Transaction log backup on ALL nodes.
- Expand SQL Server Agent, Jobs
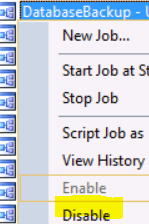
- Right click on your Transaction job and choose Disable. This needs to be done on ALL nodes that are part of the AG.
4. Remove the Node (DR node) from the AG.
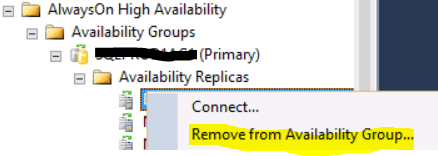
- Expand AlwayOn High Availability, Availability Groups, your AG, Availability Replicas. Right click on it and choose Remove from Availability Group… Follow the prompts to remove it out.
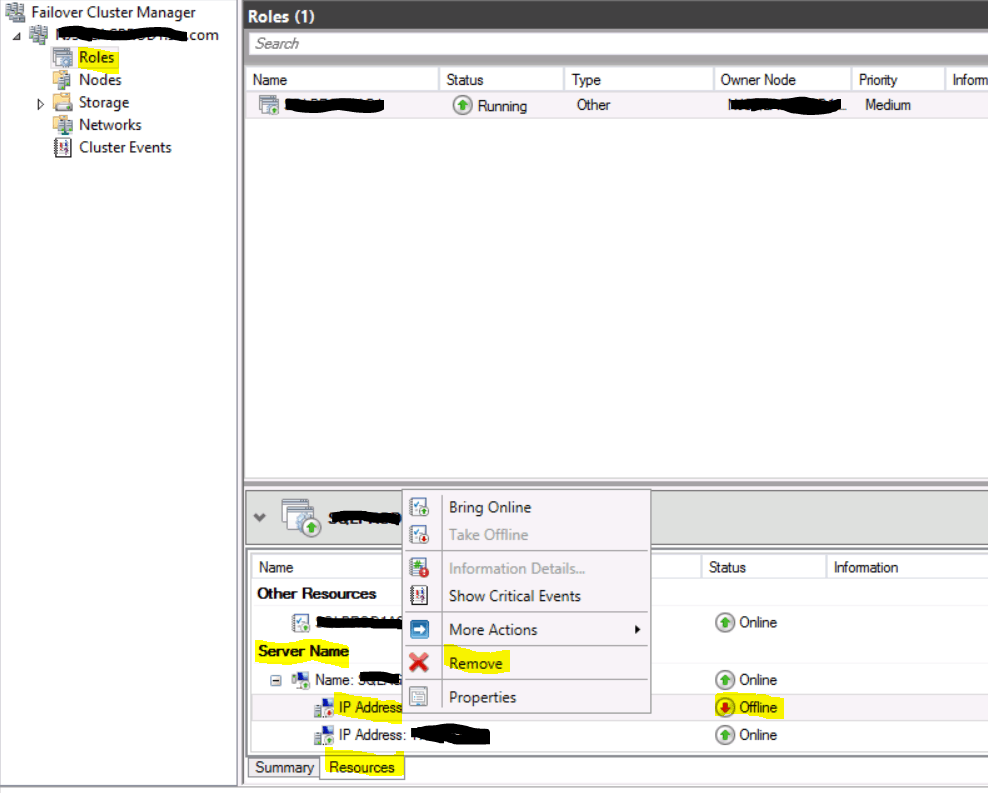
5. Remove the no longer used DR listener IP from the AG
- Open Failover Cluster Manager.
- Remove the listener IP from the AG.
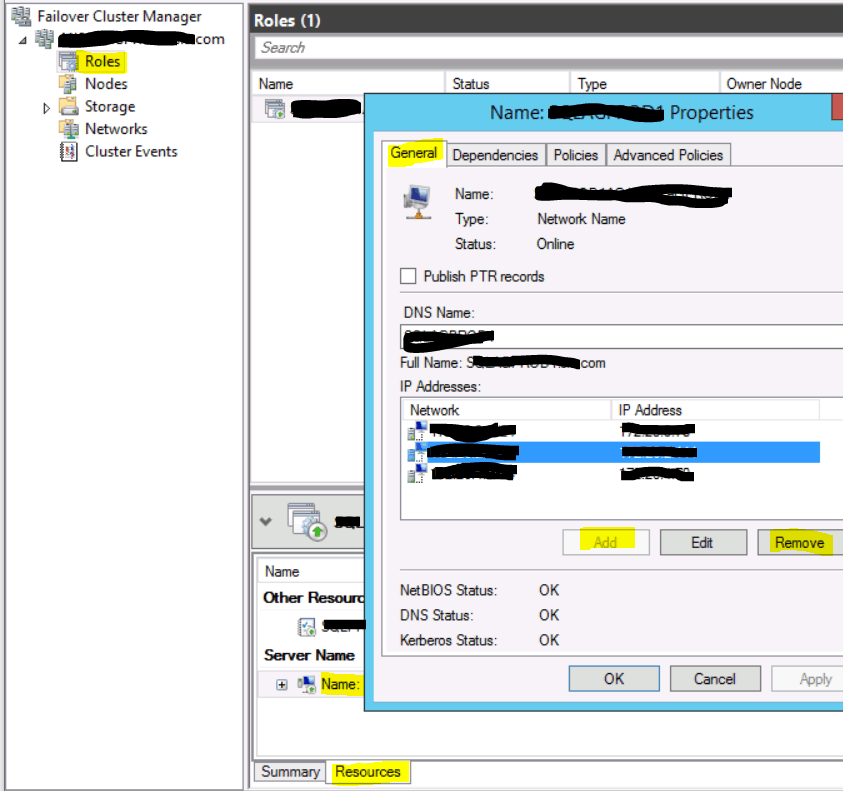
- Click Roles, then highlight the name of your AG.
- Click on the Resources tab.
- Highlight the IP you want to remove (it should be offline
 ), right click on it and choose Remove.
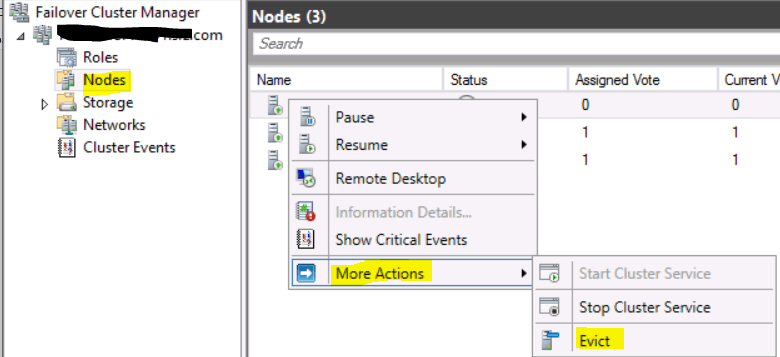
- Evict the node from the cluster.
- Click on Nodes.
- Right click on the Node you want to evict and choose More Actions, Evict. Click Yes to evict the node out of the cluster.
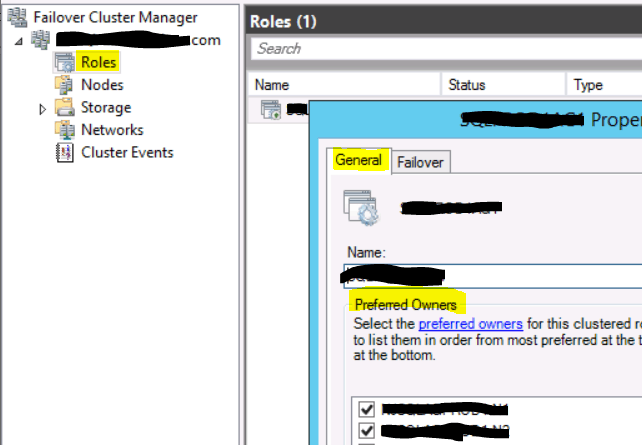
6. Verify the preferred owners are set to the remaining nodes.
- Click Roles, then highlight the name of your AG.
- Right click on the AG and click Properties. Verify both primary and secondary
- Verify both primary and secondary have a check mark next to preferred owners.
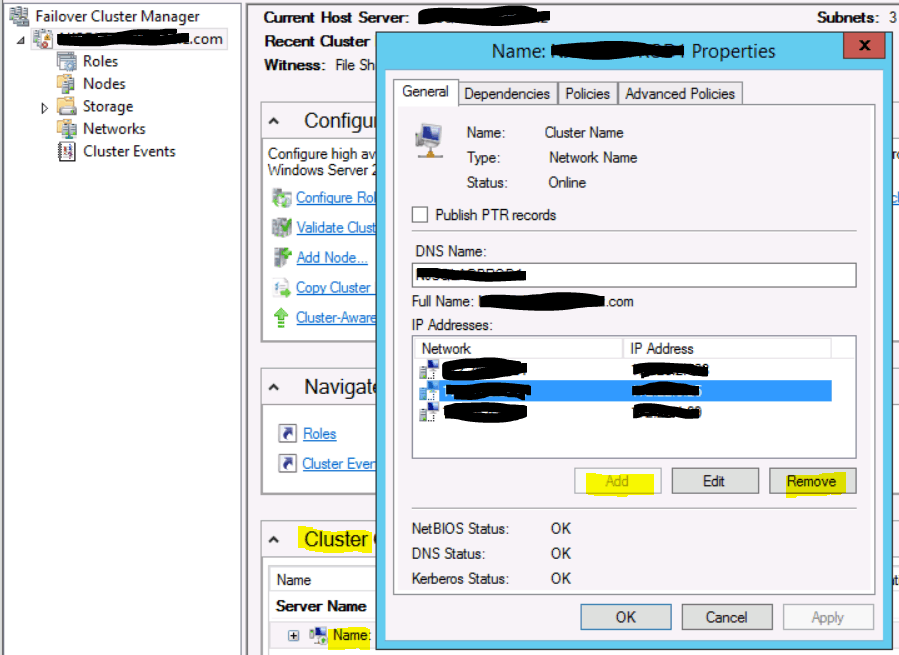
7. Remove the old cluster IP and add the new one.
- In Failover Cluster Manager, click on cluster name, go to Cluster CoreResources (at the bottom of the screen).
- Right click on Server Name AG name go to Properties. Highlight the old cluster IP and click Remove.
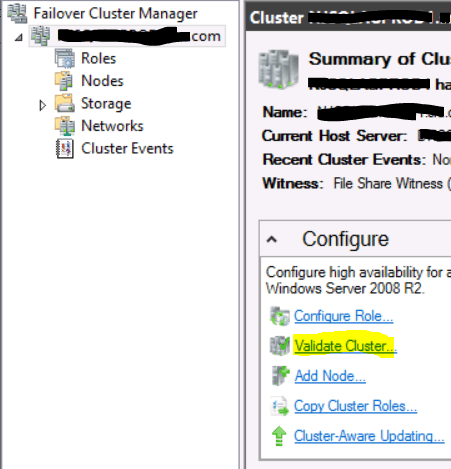
8. Validate the cluster. Make sure there are no errors within the report. Look at what the warnings say. Fix if need be.
9. You are now ready to VMotion, change IP, etc. the DR server.
10. Once you are done, update DNS with the new IP address for the node and cluster for that subnet.
Add the Node back into the Cluster then AG
1.Add the node back into the cluster. Re-Validate the cluster. Make sure there are no errors.
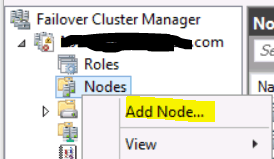
- Add the Node back to the cluster.
- In Failover Cluster Manager, click on cluster name, right click on Nodes and choose Add Node…
- Follow the steps to add the node back into the Cluster.
- Add the new cluster IP.
- You will need a new IP address for the cluster (this is NOT the server IP address it is a separate IP address for the cluster for that subnet). You may or may not be asked to run a validate cluster test. If you do, please proceed. If not, run it after adding the node into the cluster.
- In Failover Cluster Manager, click on cluster name, go to Cluster Core Resources (at the bottom of the screen).
- Right click on Server Name AG name go to Properties. Highlight the old cluster IP and click Add to add new cluster IP in the new subnet.
- It will show the new cluster IP as offline and it should since only one Cluster IP can be active at a time.
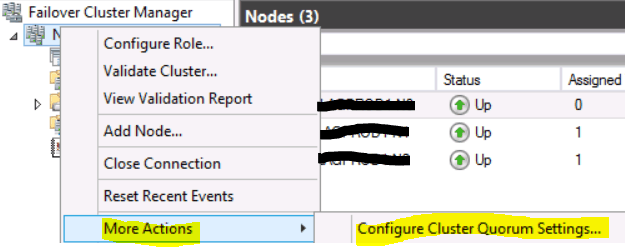
2. Change the Node to be a non-voting node.
- 0 means the node has no vote. 1 means the node has a vote. Changing cluster settings for votes.

- Changing cluster settings for votes.
- Microsoft likes odd number of votes for clusters (the number of nodes plus if you have quorum i.e. cloud witness, file share, etc. We have three nodes and a file share as quorum witness that is why we are setting the DR server to NOT be a voting server. If this server location is far from the primary and secondary servers, we do not want its vote to affect the cluster due to network latency, hiccups, etc.
- Right click the cluster name, More Actions, Configure Cluster Quorum Settings, Advanced quorum configuration, select the node you do not want to have a vote, then keep going until you finish the configuration. This change is dynamic.
3. Fix the listener to use the new IP address. (Pick one option)
- This is faster. In Failover Cluster Manager, choose Roles, click on your AG. Click on the Resources Tab. Expand Server Name. Right click on the listener name go to Properties. Remove the IP of the old listener if you did not already remove it. Add the new listener for the new subnet. Click OK. Refresh.
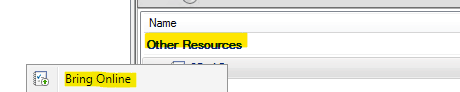
- You may have to restart the AG within Failover Cluster Manager if it shows the AG as offline. If so, right click on the AG under Other Resources and click Bring Online. This will start the listener as well.
- OR
- Add the listener in when you add the Node back into the AG.
4. Using SSMS, add the node to the AG.
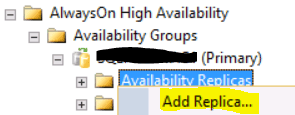
- Expand AlwaysOn High Availability and your AG.
- Right click on Availability Replicas and click on Add Replica…
- Go through the wizard to add your replica back into the AG. Set the Node to be synchronized temporarily. You want to use a JOIN ONLY to add the databases into the AG since we do not have to delete the databases in the node you are adding back into the AG. Since we turned off the transaction log backups, we should be fine with the AGs going online once you join the servers. If you did not add the new Listener IP address in Step #4 above then you need to make sure and add the listener IP for the new subnet in this step. If you don’t, the node will fail to join the AG and you will have to add the listener in using the Failover Cluster Manager, then join that node to the AG.
- This step may take some time to add the Node and databases back into the AG especially if there is a big difference in location and a large amount of databases. Be patient it will finish.
- If some of your databases do not join into the AG, go to the Troubleshooting Steps section of this blog.
- Open the Dashboard and verify all databases on all nodes are showing Failover Readiness is set to No Data Loss. You may need to refresh often to show the new status.
- Change the Availability Mode for this DR server back to Asynchronous commit. IF that is what you want this server to be set to. If the server’s location is far from the primary and secondary and the network bandwidth is slow or prone to hiccups it is recommended to set the DR server to Asynchronous commit.
- Expand AlwayOn High Availability, Availability Groups, your AG, Availability Replicas. Right click on it and choose Properties. Verify or change the Availability Mode is set to Asynchronous commit.
- Open the Dashboard and the Failover Readiness for the databases on the DR server will show as Data Loss due to changing the Availability Mode. If they still show as No Data Loss, you can refresh until that changes.
5. Re-enable the transaction log backup jobs on all nodes.
- Enable Transaction log backup on ALL nodes.
- Expand SQL Server Agent, Jobs
- Right click on your Transaction job and choose Enable. This needs to be done on ALL nodes that are part of the AG.

- ***NOTE: Kick off the transaction log backups on all nodes unless you know which server those backups should run from.
The thought of moving a server and changing the IP address of that server from one data center to another may seem daunting but it can be done successfully. Hopefully you can test this out in a development environment but that is not always available. So, it is imperative that you understand the steps involved and are as prepared as possible.
Troubleshooting steps
While the DR server and databases are being added back into the AG, you may see some databases error out during the join process. The DR server will join fine (if you add the new listener in using the Failover Cluster Manager or when you add the node to the AG) but you may see that some, if not all, of the databases did not join to the AG. This could happen if you forgot to turn off the transaction log backups or some other process made a transaction log backup during this transition period.
Adding transaction log backups to a database in Restoring State
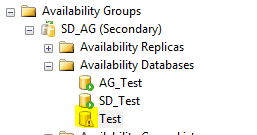
1.Using SSMS, connect to the DR server. Expand Availability Groups, your AG, Availability Databases. You will see your database and it will have a Yellow (!) exclamation mark.
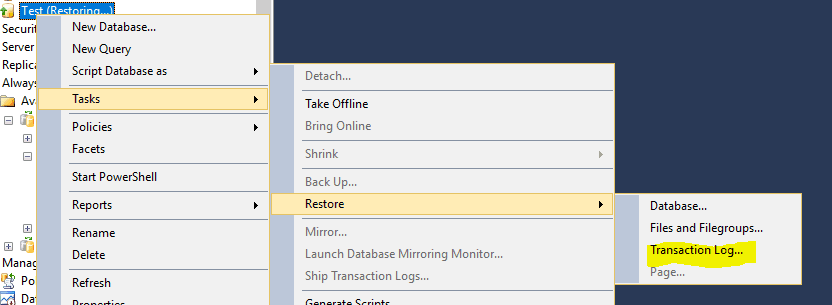
2. Look at your backup chain, find your transaction log backups and load them. You can script out the restore or use the GUI to load the transaction logs. Via the GUI, on the secondary, right click on the DB that shows Restoring, click Tasks, Restore, Transaction Log… Once you restored all of the transaction logs, keep the database in RESTORE IN NORECOVERY. The database has to be in Restoring status in order to join it.

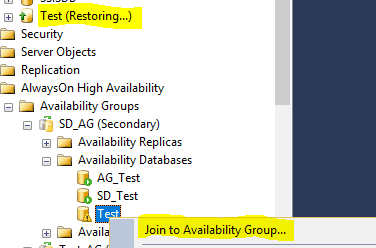
3. To add the database to the AG, right click on the database that has an exclamation (!) mark in front of it and click “Join to Availability Group…“.
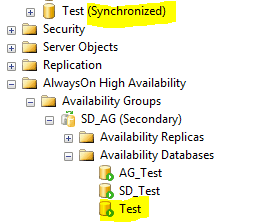
4. If you loaded all of the transaction logs, the database will join the AG successfully.
Restore FULL backup
If you can’t find the transaction logs or you do not want to go through that process of loading them, you can make a FULL backup as COPY ONLY and restore it.
1. Make a FULL backup with copy only, copy the file to the DR server and restore it, just make sure and set the Recovery state as RESTORE IN NORECOVERY. The database has to be in Restoring status in order to join it to the Availability Group.

2. To add the database to the AG, right click on the database that has an exclamation (!) mark in front of it and click “Join to Availability Group…“.
3. If you loaded all of the transaction logs, the database will join the AG successfully.